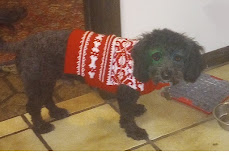
I tried the Knitware pattern for 18" dolls, but somehow it didn't work. So, I borrowed what I could and came up with these this morning. Too lazy to fire up the camera so just stuck it on the scanner. But you can see in the pic that follows that they fit. Here's how I made them:
MACHINE midgauge 6.5mm
YARN worsted (I think more medium than heavy)
GAUGE 4 st x 6 rows = 1" at T 10
FINISHED SIZE Length 8.5", width 6.5" at hips (x 2=13" around after seaming)
KWK means knit, wrap the end stitch, knit back
Increases - move 3 stitches out one needle and pick up the heel of the inside stitch and hang on to the empty needle.
Decreases - move the end stitch in one needle.
Start at the cuff and knit to waistband.
Knit 2:
Cast on over 26 stitches with main yarn. At T 3 knit 4 rows. Change to T 10, knit 4 rows. Hang a hem. RC 000. Increase one stitch both sides, knit one row. Increase one stitch both sides every 3 rows to 40 stitches. Knit to RC 28. Shape crotch. Bind off 4 stitches at the beginning of the next two rows. Decrease 1 stitch both sides, knit two rows 2 x. (26 stitches) First leg, CAL. Second leg, CAR. Short row for the rear end. Set machine to hold. Put 13 needles on the right (left for other leg) on hold. KWK. Put 4 stitches to hold, KWK 2 times. Take machine off hold. Knit to RC 44. On RC 44 run a length of contrasting thread so you can see which stitch to hang later for the hem. Change to T 4 and knit 11 rows. CAL. Hang hem. Knit one row left to right and bind off around the gate pegs with the latch tool. Seam the back from top to crotch. Seam the front top to crotch leaving openings both sides on the front of the waist band for the I cord to slip through. (Make sure the short rowed butt is the back side.) Seam the legs both sides. Remove the marker thread.
Make a 3 stitch I cord at T 3, long enough to go around the waist, tie knots on the ends and tie a bow. (Sorry, I forgot to record how many rows, but you can measure while on the machine.) Hide the ends of the Icord inside the cord. Run the I cord through the waste band. Steam the pants a little if desired.

There always seems to be a "if I were to do these again" sentence.... I'd make them a little shorter (-6rows) and a little tighter (T 9 instead of T10). They're a little loose, but they look ok. One more outfit done for the sil.


3 comments:
Very cute!
Nice pattern! Can this be done on a 1956 Brother's Knit Machine? IDK how to knit but I have this machine I inherited.
I'm not familiar with the really old machines. If the needles are 4.5 mm apart, the pattern won't work as is. If the needles are 6.5 or 7 mm apart it will work. If the machine is a bulky, i.e. the needles are 9mm apart, the pattern will work but will be a little large. First find out if it has a sponge bar---it probably needs to be replaced. Find a dealer near you. Second, watch Diana Sullivan's videos on YouTube or, again, find someone to teach you. It's a slippery slope at first. Good luck!
Post a Comment