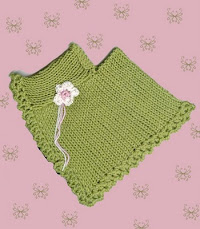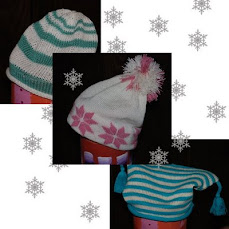
Here's an idea for an easy, last minute gift. It's a quick knit, can be done with any yarns and any machine. Could probably be easily knit by hand too -- but why spend days when you can get this one done in short order? My vote goes for machine knitting any day for sure.
Machine: Any
Yarn: Any- is a good pattern to use up yarn, but different yarns should be the same weight for smooth joins.
Gauge: I used largest tension on a midgauge with medium worsted wt yarn (4 colors of Caron Simply Soft) to get nice drape. Do a swatch or two to get the best gauge for your yarn. My gauge was 4 stitches and 4.6 rows to 1” on the midgauge.
Finished size: 11” wide (fully stretched, but it rolls in and scrunches up) x 5.4 ‘ long to wrap around the neck once and knot somewhat like an ascot. The end knots take up (shorten the scarf) about 2” each end.
The idea is to knit strips and attach strips as you knit. You can reverse the purl and knit side for each strip or keep the knit sides all the same and the purl sides all the same. You leave 40 rows unattached each end and knot for a “fringe”. Changing colors each strip, changing colors mid-strip or using hand dyed yarn would all give a nice effect. Knit time is about one hour!!! 4 skeins of Simply Soft will make 2, possibly 3 scarves. Normally I'm not too crazy about acrylic, but this brand is soft and I'm not sure whether the intended recipient likes wool or not.
DIRECTIONS for Midgauge (adapt for standard or bulky doing a little math to get the size you want):
Strip 1- Ewrap cast on over 10 needles. RC 000. T 10 knit one row, hang claw wt. Knit to RC 40, hang a marker. Knit to RC 260, hang a marker. Knit to RC 300, bind off. (Move wt up as you knit.)
Subsequent strips- Ewrap cast on over 10 needles. RC 000. T10 knit one row, hang wt. Knit to RC 40. With right or wrong side facing, begin hanging previous strip at the point of the first marker onto the leftmost needle of the new strip. *Hang a loop from the old, K 2 rows.* Continue from * to * until RC 260. Knit without attaching to RC 300, bind off. (Move wt up as you knit.) Repeat from to for as many strips as you want the width.
For the midgauge I found that 4 strips made a nice width. For the standard I did 7 strips of I cords (the row count was also different. See Knitwords #53 for the pattern. Still available for purchase from the Knitwords website.) Pictured below, a little different effect but same principle of assembly.

Finishing: Run in the yarn ends, remove markers. Tie a knot at the very end of each strip. Voila’, you are done. Probably no need to steam. You don’t want to flatten out the knots.
Tip re hanging stitches: You want the loop not the knot on the edge of the previous strip. Once you get going, the previous loop will be stretched out. You don’t want that one again. Look above the stretched out one for the tiny knot and above that will be your next loop to hang. Keep unfolding the edge with the fingers of your left hand so you can see the loops and knots.


5 comments:
Found this through the knitting machines list. These are ADORABLE, what a great idea!! Thanks for sharing!
compliments beautiful
Great idea for those ends of lovely yarn that are too good to end their days as waste yarn!
Thanks for sharing the pattern Mar!
Liking this! Might even get some knitted for presents.
Your work is wonderful. When I get my machine set up, I'll be making at least on of your hats. Great job!
Post a Comment