machine knitting midgauge standard bulky machknit knit machine-knit patterns

Sunday, May 22, 2011

Machine Knit Baby Sweater Using Sock Yarn


More baby things! I was inspired by this sideways knit sweater, a free pattern by Opal yarns, using a yarn called Opal Brazil Sock Yarn. I had saved it a couple of years ago and now when I search the internet, I can't find the pattern anymore. The yarn isn't available either, as far as I can tell. To make it on my standard gauge machine, I crafted it up in DesignaKnit, with my own gauge.
This is what I came up with. When I put the images here, they get a little blurry, so if you want the actual numbers, click on the image and it will enlarge with more legible numbers :

AND

Knitting a sideways sweater is a little confusing, so you'll need to think it through a little and make a cheat sheet for yourself as to when to put stitches on waste yarn, when to pick up the whole thing again, when to bind off a section. Maybe it wouldn't be as tricky for you as it was for me to visualize. I think once it's on the machine, it makes more sense. Sorry, I didn't actually write out the steps or I'd provide that here.
So, this is what the sweater looks like. I used some sock yarn (lost the label)that gave a 7st x 10 row gauge at T 10 on the standard gauge machine.

After I got the piece off the machine, I noticed that the fronts matched---were mirror images of each other. I didn't try to get it that way! And, I'm sure if I had tried, I would have screwed it up. Funny!!!
To do the collar, I left live stitches on the front neck on waste yarn and picked up stitches on the back neck. I knit a few rows stockinette and a few rows ribbing so the collar wouldn't roll. Picked up the front plackets and cuffs to do 1 x 1 rib on these as well.

I can't decide whether I love this sweater or not. For some odd reason, it reminds me of a 1970's leisure suit! And the colors are pretty shocking/strong for a baby. Fortunately, this baby will probably, most likely, undoubtedly have lots of things to choose from in his wardrobe!!!
PS It's supposed to be about a size 12 months.

Thursday, May 19, 2011

Sewing a little baby quilt


I thought I'd try my hand at a "raggy" baby quilt. I can't say it's the most favorite thing I've ever made, although it did only take me two days, maybe 6-7 hrs to make. I bought 3 different flannels that were 42 inches wide and 42 inches long. Then I cut them up to 7" squares, nothing wasted. I arranged them so that one print was the same on all the pieces (the back side) and the top would be a checkerboard of the other two fabrics. Sewed a squiggly X across each piece and sewed the patches together using a one inch seam allowance with all seams on the right side of the blanket.

I sat outside in the glorious spring sun and cut little snips every 3/4" across all seams. Took me about an hour and a half. I loved this fabric---very soft and very sweet prints.

Ok, now the part I'm not so happy about. I washed and dried the thing to get the raggy/chenille effect on the seams. Checked the washer, then the dryer often to clean out the threads. The final effect: to me, it looks used and old. The fabric is still soft, but sort of wrinkly. I am told this is how it is supposed to look, but I'm not that enthused about the look of it. O well, had to try it.

Here's a closeup of one of the prints:


And, here's what the backside looks like, a bunch of little cowboys and cowgirls:


Not my proudest day, but I think it will be a good blanket to use on the floor or in the car because it's a little heavy. On to the next baby project...

Wednesday, May 11, 2011

Debbie Bliss' Ribbed Baby Jacket Converted to Machine Knit


This pattern has captured my attention 3 times now. The first two times I knit it on the midgauge.

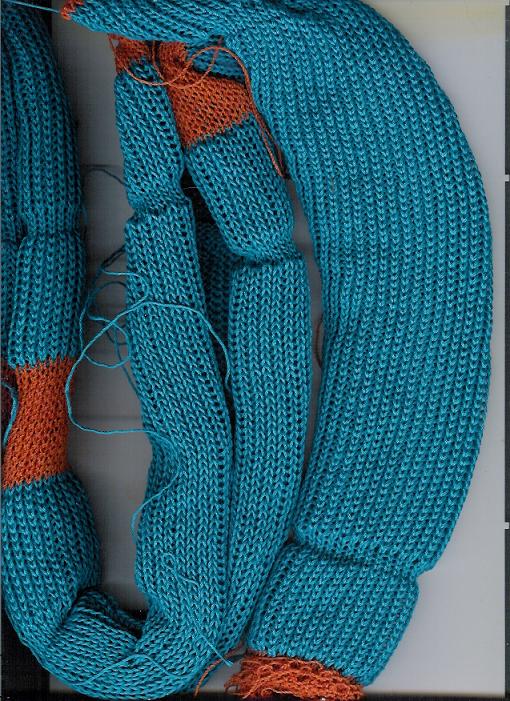
This time I converted it to the standard gauge machine. (Yes, lazy. It's squished under the lid of my scanner.) I used cotton and made a size larger than I wanted the finished size to be. Then I threw it in the washer and dryer so that it would do all its shrinking before I give it away. The cotton turned out so soft, I'm really pleased with it. And the variegated blues look kind of like jeans. Boyish, anyway.
I'm not too sure about the buttons, though. What do you think? I can always change it. The "button holes" are just crocheted loops. I guess my thinking was that the big buttons would be kind of trendy/funky.
You can find the pattern here: http://www.allaboutyou.com/craft/Knitting-pattern-ribbed-baby-jacket/v1 The baby model is so adorable. But there are a couple of things I don't like about the pattern. The bottom curls like crazy with no edge treatment and the sleeves do as well. So, I added the 2 x 2 ribbings and I think it's a big improvement. Besides, when the baby grows, the sleeve cuffs can be shortened and then rolled down. If you knit this on a midgauge, you can pretty much just follow the pattern as is. I suspect the prototype was machine knitted anyway by the way the pattern is written. But, if you want to knit it on the standard gauge machine, you need to do a tiny bit of math.

A friend and I worked on this together, did a schematic and adapted it. Here's what the schematic looks like for 12 months. If you'd want a different size or different gauge, first download the pattern from the website and then use the measurements to come up with your own stitches and rows. If you click on the picture it will enlarge and you'll be able to see the numbers more clearly.

Yes, she's getting obsessed with baby stuff....

Saturday, May 7, 2011

Every moral has a story...


What a crazy last two days!!! Long story coming....no, you can't buy DAK at a computer store, sadly.

My son's car needed an oil change. The car dealership said they'd have his car for several hours. So, he called and asked if I'd pick him up at a nearby computer store that he could walk to. If I could pick him up, he could be at home while the car was being worked on. Since I'm such a good mom, I said sure. Keep in mind, this store is about 11 miles from my house.

Trip 1, going to pick up the son from the computer store. The drama begins. I can't resist looking at stuff in a computer store and noticed they had some refurbished laptops with WINDOWS XP on them!!!! Since DAK works great with XP, I don't own a laptop and kind of think I need one, Windows XP is a rare dinosaur, it was a reasonable price, I thought this would be good insurance/backup for when I no longer have a computer that works with DAK. So went my fairly reasonable thought process. As a result, I happily took an IBM Thinkpad home with me. Took me a couple of hours to get connected to the internet, download and install Norton anti-virus, download updates for the anti-virus, upgrade the XP stuff from Microsoft, stuck in DAK to see if it liked its new home, etc. etc. etc. I was minding my own business, surfing, etc. and suddenly the blue screen of death came up and said "Hardware failure. Return computer to administrator/seller" or something like that. These laptops were used by businesses and then (supposedly) refurbished. So, even though I couldn't turn the d*** thing off, I could get the disk out. I put everything back together and returned the laptop to the store and got an exchange. Trip 2. No problem.

Did all the preparation as described above with the Thinkpad laptop replacement. Something niggled at me and I finally realized there was no sound on this computer. Went to every place on the computer that deals with sound and increased the volume to the max. Went to the website and downloaded a new driver. Nothing worked. Getting disgusted now! Too many hours invested. So I uninstalled DAK, packed everything up and returned to the store for a REFUND. Trip 3. Done with this nonsense!

They were really nice about it at the store and I was feeling pretty good about my decision to quit messing around with a refurbished computer. I'll take my chances with the two computers I have at home that work fine with DAK.

When I got home, I thought I would convert a Dale of Norway baby graph to a stitch pattern and start working on a sweater for the little guy. YIKES!!! no DAK disk. (I always run DAK from the disk.) Absolute panic when I realized I returned the disk to the store, still in the laptop's cd drive. I called the store and the employee (John the phone guy) sounded a bit irritated but said he'd look for the computer and see if the disk was still there, then call me back. This is a big computer store, a national chain, and I thought there was a possibility that the computer was already on a truck ready to be transported somewhere. Had already rationalized in my head the purchase of a replacement DAK disk. I was almost in tears when...........brinnnnnnnnng! The phone rang, he had it, I could come pick it up. Geeze Louise!!! I think if I hadn't wanted to work on DAK right away, the computer and disk would have been gone. Thanked my lucky stars. 4 round trips in two days. Don't even care about the wasted, expensive gas anymore.

Moral of the story: USE YOUR DAK EVERY DAY!

PS Car got its oil change. On one of those trips, the son got transported to his car. I was so focused on the DAK and the stubborn laptop, I can't even remember where in the sequence I took him to the car place. After all, first things first.

Friday, April 8, 2011

What has your knitting machine come up with now?


This is probably a trick you learned long ago. If so, disregard this post. Maybe some readers haven't tried this time-saving technique, though, so I'll soldier on. To make a short story long, I had my kitchen redone. Looking at my old dishcloths, I decided they had to go. Needed some new ones to match the fresh new look of the kitchen. So, I had a nice cone of turquoise cotton that would do the trick. Rather than knit each one separately, I did the waste yarn method of knitting a continuous strip. You'll need a fairly fine crochet hook. If you don't have one, you may be able to get by with your latch hook, but I find it more difficult to use than a plain crochet hook when doing this.

Here's what you do: (Directions apply to a standard gauge Brother machine. You would adapt for other gauges and machines.)

1. Cast on any old way with waste yarn over 61 stitches. Knit about 12 rows to make sure things don't unravel. You're going to need quite a bit of weight to help the tuck stitches knit off. Move them up every few inches.
2. Pull off main yarn that is 4 times the width of the knitting and put the yarn in the yarn feeder at that point.
3. Use the 1 x 1 punch card or electronic pattern. (See below.) Row counter on. KC II with main yarn right to left. This sets up the tuck pattern.
4. Push in both tuck buttons and engage the weaving brushes to help the stitches knit off.
5. Knit to RC 30. Leaving the KC II on, turn off/release the tuck buttons and knit 4 rows. (RC 34) This makes a nice band.
6. Push in both tuck buttons again. Knit 146 rows to RC 180.
7. Leaving the KC II on, turn off the tuck buttons and knit 4 rows. (RC 184)
8. Push in both tuck buttons again. Knit 30 rows to RC 213.
9. Set change knob to normal, release tuck buttons. Knit one plain row left to right. (RC 214)
10. Pull off yarn that is 4 times the width of the knitting and cut, leaving the end hang.
11. Knit 12 rows of waste yarn, plain stockinette.
Repeat from #2-11 as many times as you have yarn for.

And the snake like tube is what you take to the couch. Cut the dish cloths apart, half way into each band of waste yarn. Then, you watch a good movie whilst crocheting the ends shut (single crochet stitch works fine) with the long end of yarn. Throw away the waste yarn and end up with a whole new bunch of dishcloths that look like this:


I got 10 dishcloths out of this cone. Your mileage will, of course, vary.

Friday, April 1, 2011

Beach Plastic

Normally I restrict (pretty much) my blog to knitting. Specifically machine knitting. But I came across this video and was amazed, sickened, disheartened, fascinated and uplifted by this couple. So I had to share it.

One Plastic Beach from Tess Thackara on Vimeo.

Saturday, March 26, 2011

Elvish Feet


Since winter is hanging on through March it appears, I'm still in the mood to felt slippers. This is another version of Kris Basta's slipper pattern with a couple of twists. I knit 12 rows for the cuff instead of 6 and hung a hem. Makes a nice, sturdy edge. Then I did stripes, changing color every 4 rows. I just carried the yarn up the side without cutting it. Then I made the leaves. Here's how:

Using the same tension as the slippers, ewrap cast on 3 stitches. Knit 10 rows. Hang a hem with first stitches on top of the 3 in work. Knit 2 rows. You'll leave the very center stitch as is. Move one edge stitch out one needle both sides. Pick up the purl bump and hang it on the emptied needle. Knit 2 rows. Move two edge stitches out both sides one needle and fill in with the purl bump. Continue like this, moving one more stitch out than the previous time both sides of the center stitch, filling the emptied needle with purl bumps and knit 2 rows===until you have 15 stitches in work. Knit 4 rows. Take off each leaf and store it on a garter bar or hand knitting needle. Make 6 leaves for each slipper.

Now sew the slipper together. Sew 3 leaves on the front and 3 on the back cuff, spacing them evenly just under the lip of the cuff. You'll have a few more leaf stitches than there are cuff stitches. Every now and then, pick up two leaf stitches to gather them. This will make the leaf point down rather than straight out. I sewed the sides of the bottom of the leaf together so that once felted it looks like a tear drop, no hole evident.


Yes, I do know they're silly. But I like them. Anything to cheer up this endless winter!