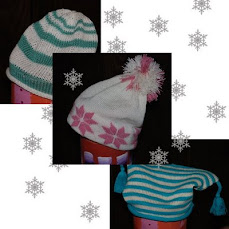
I wanted to give this hat pattern a Norwegian name. So, I tried the Google translation
service for English to Norwegian and
here are some suggestions. Not sure
which would be most true.
Maybe a Norwegian
speaking person could help me out.
Anyway, here’s my first attempt at a 3-6 month hat. Pretty cute. The size seems ok, but I don’t have a baby to try it on. So this is my best guess. Will be donated, so size isn’t crucial right now. Finished dimensions (including ribs) are width at tip 6”, width above ribbing 5”, top to bottom of the neck 6”.
Yarn: from my stash, acrylic. Use something that gets close to this gauge. Mine had no label.
Machine: standard gauge with ribber
Gauge for
stockinette: 31 st = 4” and 37 rows =
4” @T 7.
Kinda weird, I know but close is ok I would think.
Directions:
Overview…
(knit from front of face to back of head)
1. 75 needles 1 x 1 rib. Do Susan Gualiumi’s nifty cast on for
rib. My new bestie because it lies
perfectly flat, no flare, but is still stretchy.
Use the manual’s cast on with
waste yarn, (zig zag row) insert rib comb, add one barrel weight in the middle,
do 3 rows circular, cancel circular and
knit about 1” of rib with this waste yarn.
Tension doesn’t matter so much here. Change back to circular and k the
last 2 rows with ravel cord. Snip waste
yarn and ravel cord. It’s ok if you forget to switch to ravel cord, but it’s
harder to remove at the end than it is when you use ravel cord.
2. Main part. With main yarn, T6/6 do the manual’s cast on again
and knit 12 rows ribbing.
3. Change to regular sinker plate and
transfer rib stitches to main bed. Knit
stockinette at T7 to RC 38, which should be about 5”.
4. Begin short rowing so that you get
the elvish point at the back of the head. Important to weight the knitting so the stitches don't pop off. Set machine to hold. *CAR put 7 N in hold at the left of the
knitting. Knit across, wrap the end st so you don’t get a hole. Put 7 needles on right in hold. Knit across to the right and wrap the end st.*
Continue from * to * until you have 5 stitches left in work. Put 2 in hold, knit across and wrap, put two
on right in hold, knit to the right.
5. Put all stitches back in work (or just
undo the hold setting) and knit 2 rows. Bind
off.
6. Stitch the back of the head seam by hand.
7. Bottom
neck ribbing. With the wrong side of the
knitting facing you, stretch out the bottom of the hat to pick up 70
stitches. Try to pick up in the ditch
between stitches at the same place across.
Knit 2 rows stockinette at T 10.
8. Change
sinker plate to rib, transfer every other stitch to ribber. At T 6/6, rib 12 rows. Transfer rib stitches to main bed and bind
off with your favorite bind off technique.
On this one I did around the gate pegs.
9. I cord Straps: I know some object to ties, but many babies do live after having had their hats tied under their chins, so I’m going with
it. If you have another method, have at
it.
Pick up 4 stitches at the bottom corner of one front. Set carriage to slip one way, knit the other. (Brother, one part button.) At T 9 knit 150 rows and bind off. Same for other side. Hide yarn ends and tie a knot at the ends of the ties.
Remove the waste yarn. There are a few yarn ends to hide. I did not steam the hat to block it, but you may want to.
Notes: You may also want to add a tassel or a pompom to the point of the hat and to the I cord ends. A fairisle pattern would be nice too. Because the seam at the back of the head can be bulky, next time I will take the top off on waste yarn and kitchener stitch the seam shut. This is an easy knit and a good way to practice short rowing if you are not used to doing that technique. I wouldn't say this is a fast knit because of the transfers between beds, but worth it, I think. If you don't have a ribber, a hung hem would do.


