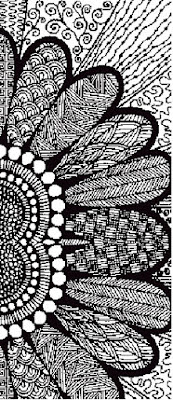
 I hadn't heard of the term "zentangle" before and happened upon it by accident. I thought many of the designs would make terrific scarves. Maybe other things too, pillows?,but I started with scarves. Here's how I did it:
1. Google 'free zentangle' or 'free adult coloring book pages'. There are so many, it's a little overwhelming. You'll want black and white images that are not copyrighted.
2. Pick an image you like and click on it to enlarge it. Right click on it and choose Save image as. Give it a name and save as a jpg or bmp. I like to save to my desktop temporarily so it's easily accessible.
3. Open the Paint program (or other image processing program that you are familiar with). Open the image.
4. Paint will tell you how many pixels the image is in both directions. You can resize the image in Paint or in DAK. I find that resizing it first then putting into DAK works better. Resize the image so that the width is compatible with the number of needles on your machine. Write those numbers down. The original was 211 by 288 pixels. By removing some of the width and doubling the length I got it to the size I wanted.
5. Open DAK. Now there are at least two ways you can convert this image to a knitting pattern. I'll tell you the easiest way, in my opinion. You can use either stitch designer or the graphics studio. I used stitch designer. When you open the stitch designer part of the program, choose File...new. Specify the number of stitches and rows from #4. Now go Edit...paste. Voila, you have a stitch pattern. You may need to fool around a little in terms of cleanup or deleting stitches and rows.
The biggest obstacle is that black and white images aren't really black and white. You typically will get lots of whites and lots of blacks. Replace all the whites until you have just one shade of white. Do the same with the blacks and grays.
Left click on the color you want and right click on the one you want to change, then click on the arrow marked in red. This is what I got when I converted the sunflower image. Took a little time, but not too bad. Make sure you have one main and one contrast color.
I made a folder called Zentangle designs and saved all of the conversions in that folder.
It's fun to vary the colors keeping just two colors in work. (You may want to do dbj, in which case you could do more than one color in a row.) I chose to use fairisle, because on a scarf that I'm going to fold over and seam the long side, long floats won't matter. The floats will be hidden inside the scarf.
Some designs are not rectangular and I wanted to add some length so in addition to doubling the image, I chose to knit several inches on both ends in plain stockinette. I think it's fun to fool around in the program--- call me geeky, I guess. Some colors I thought were interesting:
If you try this and have some difficulties, write to me and I'll try to help.


