Tuesday, April 28, 2009
Toddler Tam
I think this is hat #8 to be donated. Is a lot cuter in person, but being squished under the lid of the scanner does nothing for it. I'm thinking it will fit a toddler, made to go with the loopy edged scarf. I temporarily sewed the hat to the scarf so that the two don't get separated when donated, in case you were wondering what those loose yarn ends were for.
TODDLER TAM DIRECTIONS I used my never-ending cone of pink Tamm Trenzi (acrylic). The tam is made by doing 9 short-rowed wedges, band knit separately and hung to the edge of the wedges, side seamed on the machine.
CO with waste yarn over 66-0-66 N and knit a few rows. Change to main yarn, carriage at the right, T7 knit one row. Set machine to hold. *Carriage on the left. At side opposite the carriage, hold 2 stitches. Knit 2 rows. (No need to wrap the end needle. Can make a decorative line between wedges.) Repeat until you have 14 N remaining in work. Cancel hold, K 2 rows.* Repeat for 9 wedges. Take off on waste yarn. You have a circle with an open edge. Make a band: 65-0-65 st, T 4, cast on with waste yarn and knit a few rows. With main yarn knit 14 rows, change to T 10 (for a turning row) and knit one row, T 4 knit 15 rows, remove on waste yarn. Hang bottom edge of the hat, knit side facing you, evenly over 132 needles. Push to the back of the bed, hang band in hooks of needles with wrong side facing you. Push stitches through, hang bottom band stitches. Knit one row at T10.. and chain cast off. Hang open sides of end wedges with right sides together, one set of st behind latches, the other in hooks. Push through, knit one row at T10.. and chain cast off. Seam the band by hand and hide the yarn ends. Make a little loopy for the top as described in the earlier scarf pattern with the loopy edge.
http://marzipanknits.blogspot.com/2009/04/never-ending-cone-of-pink-acrylic.html
Or make an I cord loop.
........and I still have yarn left. I guess it is destined to be waste yarn.......
Monday, April 27, 2009
Purls of Joy!
I attended the Purls of Joy seminar in Moundsview, MN this last weekend, held at the AmericInn, attached to the historic Mermaid bar, grille and bowling alley. This mermaid is awesome, probably the largest land-locked mermaid in the world and she spends her entire time atop the roof. Not sure,but I think she's 20 feet tall. Just awe-inspiring. But... can you imagine how cold those boobs get when it's -20F?
The seminar is put on by the Upper Midwest Knitting Machine Dealer Club. Its members come from Minnesota, North Dakota, South Dakota, Iowa and Wisconsin. This was their 25th annual seminar. The guest demonstrators were Uyvonne Bigham, Mary Anne Oger and Charlene Shafer. Sandee Cherry was also scheduled to come but was unable for health reasons. This dealer club began as a Brother Knitting machine dealers' club. In 2002, the name of the club was changed to the Upper Midwest Knitting Machine Dealer's Club. In 1995, the seminar name was changed to Purls of Joy from the Brother Dealer Seminar. There was lots of food, lots of shopping and lots of pearls of wisdom (as relates to knitting on the knitting machine). It ends up to be a bit pricey when shopping, motel and registration costs are totaled, but worth going to considering there aren't a lot of resources for machine knitting these days. Besides, it's fun being around like-minded addicts.
Mary Anne is always popular. Her main focus was tailoring so that your garments have a professional finish. Seeing her garments in person is always so much better than viewing them in the magazine. She showed us how to do some of her nifty edges that are unique to Mary Anne. Her skills are truly awesome. Among other things, Uyvonne had some cute beaded purses done on the machine that were very popular. One of my friends bought three or four of her kits. She had a garter carriage sock that looked interesting. Charlene Schafer of Knit Knack Shop fame (Tricia Schafer's mom) had good sessions on DAK and demo'ed some of her tricks of the trade. To fill in the last minutes of one of her sessions, she told us how to do a fancy trim making use of the garter bar.
I had to try it when I got home so I wouldn't forget how to do it. For once I didn't use unkind words about the garter bar. One of her newer books is doll clothes for the American Girl doll. The clothes are sooooooooooo cute. Little details make the clothing special. No grandchildren to knit for here, so I passed on it, but not before drooling. She explained one of the options in DAK to print the neckline shaping so that the numbers aren't on top of each other making them unreadable. I'm pretty good at DAK, but that little option had escaped me to this point.
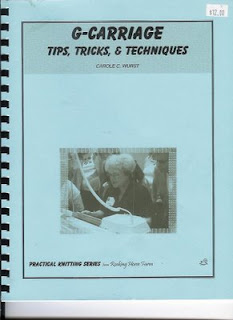
I bought a new sponge bar for my 970, a garter carriage book: Did you know that the turtle knits without a needle in it? Why don't they say that in the manual? Nabbed two cones of Poodle yarn and a 60 stitch ribber comb. I was prepared to spend more money, but was a bit restrained this time.
There was lots more to talk about, but I thought i'd share the highlights. I'd say if you have a chance to go to a mk seminar, you should spend the energy, time and money to get there. It's fun and you'll learn a lot. Besides, we need to support the dealers and demonstrators!
Sunday, April 12, 2009
The never-ending cone of pink acrylic
There must be some kind of Murphy's Law associated with a cone of yarn you want to use up and can't quite allow yourself to throw away. The other day I made a 1 x 1 rib little girl's scarf and there's still enough yarn to make another hat to go with it. I think out of this one cone I've made 3 hats, two scarves, a doll-sized shrug and a baby sized shrug. And the final thing will be one more hat. Geesh.
I made a different edging on this one.
The scarf is 50 some stitches of 1 x 1 rib at T 6. I think it's about 320 rows. After binding off, I picked up 3 stitches on one side, set my carriage to slip one way. Knit 30rows, T6, (which is really 15 rows of actual knitting) to make an I cord. Picked up a whole stitch 10 rows back and hung it on the middle needle ro make a loop. Knit another 30 rows, picked up a whole stitch 10rows back and repeated one more time. Bound off by putting the two outer stitches on the center needle and bound that off. I spaced 5 more across and repeated on the other end of the scarf. Sewing in the ends and neatening up the loops took a little time, but I don't mind doing that while watching a movie. Onward and forward...one more hat and I can call this cone a done deal.
I'm really pleased that my ribber is knitting so nicely. I had tried the credit card test where you pull out 10 end needles and two credit cards are supposed to fit under the needles and on top of the ribber gate pegs. Mine isn't as close as it should be. After trying several adjustments vertically, I decided since it was knitting ok, I'd let it be.
Tuesday, April 7, 2009
Pattern for Baby Boy Booties
I decided I'm going to have to live a lot longer to use up this pile/mess/mountain/stash of mine. Although machine knitting would use it up faster, I'm also doing little hand knitting projects because they are portable for sitting and waiting for appointments. If you're a hand knitter, perhaps you can make use of this easy bootie pattern. I always think it's hard to come up with cute things for boys, but this one came out pretty good. I apologize for not telling you the brand of yarn, but I misplaced the band and can't remember what it was. Anything worsted and heavier would approximate my sample. Another couple of ounces of yarn constructively disposed of !!! Who are they for? One can only hope...
BABY BOY BOOTIES--- an old hand knit pattern
4-09 I found this pattern scribbled on a yellowed piece of paper when I was organizing my knitting patterns. There was no author indicated, so I’m assuming it’s one of those patterns that just got passed around and people knit it with their own variations. The booties take a very small amount of yarn and knit up really quickly. For my version, I used two kinds of yarn~ scraps from my stash. With size 6 American needles, the finished size is about 9 months. These two yarns were a little thicker than worsted, so of course a thinner yarn would make a smaller bootie…Directions (both booties the same):
CO 30 sts with color 1.
Knit 6 rows in stockinette stitch for a rolled top. Change to color 2. Row 7: Make eyelet row- K1, YO, K2 tog, *K3, YO, K 2 tog, * repeat from * to * across, ending K 2. Row 8: Purl. Rows 9-12: Change to color one and knit stockinette for 4 rows.
Next row: Change to color 2. K 20, leaving 10 stitches on the left needle, turn work, P10. Work on the 10 middle stitches only for the instep. Knit 14 rows stockinette, ignoring the 10 stitches both sides on the needles. Next row: Pick up and knit 10 sts from the side of the instep, then knit10 sts left on needle. Next row: Knit to the other side of the instep stitches and pick up and knit10 stitches from the other side of the instep. Continue knitting to the end. You’ll have a little pouch sticking out for the toes and foot.
Change to color1. Work in garter stitch over all the stitches for 5 rows.
Change to color 2. Decrease for toe in garter stitch:
Row 1: K 2, K 2 tog, K 20, K 2 tog, K 20, K 2 tog, K 2
Row 2: Knit
Row 3: K 2, K 2 tog, K 18, K 3 tog, K 18, K 2 tog, K 2
Bind off. Seam the sole and back of bootie with a mattress stitch, hide yarn ends.
Make a 2 or 3 stitch I cord long enough to thread through the ankle stitches and tie a bow.
Monday, April 6, 2009
Free and Easy Dishcloth... pattern for the midgauge machine
Thinking of my sister, who is just starting to machine knit, I came up with this easy pattern to try. You could knit the whole dishcloth in stockinette, but why not add a little texture? If you are wondering why I'm starting out with the waste yarn, I like to do this with this particular machine because the weight bar is so darn heavy---intrusive---hole making. If you have a better way, certainly do it.
***********************************************************************************
Midgauge machine (Brother KX 350)
Yarn: cotton - any that will knit easily on your machine
Tension: 10 (The dishcloth will most likely shrink in the washer and dryer.)
Directions:
Cast on with waste yarn over 42 stitches. Hang ½ weight bar on the waste yarn. Knit a few rows, one row ravel cord.
Ewrap on top of these stitches with main yarn. RC 000. Knit 2 rows.
*With every other needle pusher, push the needles all the way out to E position, starting with the first N on the left and continue across. Set carriage to H position both sides. Knit 2 rows. Set carriage to normal knitting, Knit 2 rows. With every other needle pusher, push the needles all the way out to E position, starting with the second N on the left and continue across. Set carriage to H position both sides. Knit 2 rows. Set carriage to normal knitting, Knit 2 rows. * Repeat this sequence to RC 82 or however long you want it, remembering the shrinkage, and bind off. Pull on ravel cord to remove waste yarn.
Fancy it up a little by knitting 2 rows, doing the * to * pattern until RC 18. Knit 4 rows plain to make a little border. Resume pattern and knit 40 rows. Knit 4 rows plain, 16 rows pattern, 2 rows plain. Bind off. Pull on ravel cord to remove waste yarn.(84 rows total.)
**********************************************************************************
I made a little swatch just to show the stitch definition.
The other day I threw away all of my machine knit cotton dishcloths and made 10 new ones on my standard gauge machine. I use a tuck stitch, so it looks a little different than this pattern. But it's really nice to have new, non-stained ones. Yes, I'm easily entertained and amused.
As an aside...this post has been sitting as a draft for a few days because I couldn't upload my little pictures. I tried a bunch of stuff, as suggested by Blogger, and nothing worked. Until...I changed browsers. Whatever! In case you are also a Blogger user and suddenly start to have problems, I thought maybe this would help. The problem probably lies with some plug-in where something is interfering, but I don't have the patience to disable the plug-ins one by one and check.